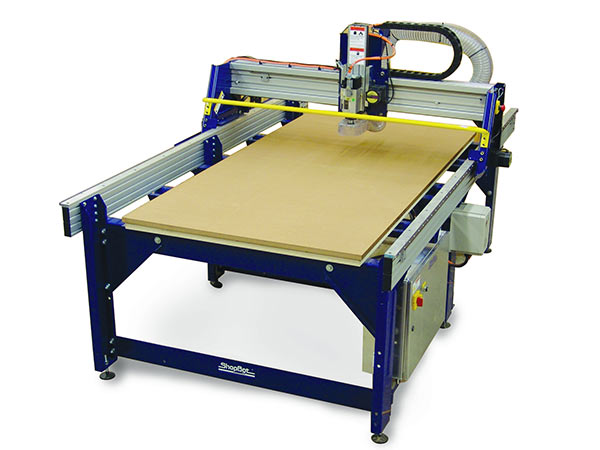
Shopbot CNC
2D Milling
The router follows vector lines. As with the laser cutter, these vector lines can be generated in Rhino, Illustrator, Onshape, or another CAD software. Since the bit has a diameter, you must specify how you want the machine to interpret your vectors. There are four options: Inside, Outside, On The Vector, and Fill/Pocket.
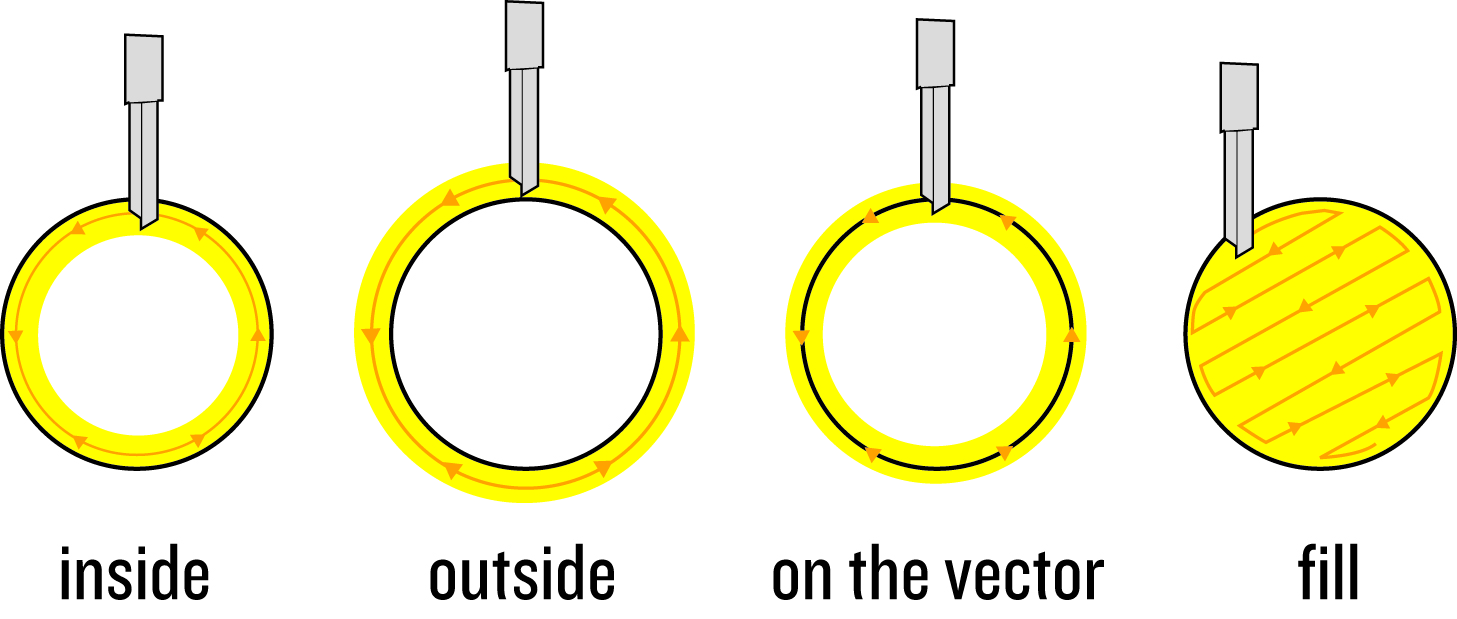
Inside:
The edge of the bit will hit the edge of a closed shape from the inside.
Outside:
The edge of the bit with hit the edge of a closed shape from the outside.
On the Vector:
The center of the bit will follow the vector
Fill/Pocket:
The bit will completely remove the inside of a closed shape.
Since the machine has a Z-axis, you can specify how deep you want a path to be cut into the material. This is great for making dados or engraving graphics.
3D Milling
The CNC router can also mill models from 3-dimensional files. For this to happen, the 3d file must be run through software that converts it into a set of instructions for cutting. It does this by analyzing the topology of the model and projecting a grid onto it. When cutting, the bit follows these gridlines (the distance between gridlines can be controlled, but is primarily based on the width of the bit). A basic diagram for the analysis of a 3d model along one axis:

A very important thing to note: The bit is only capable of moving up and down; it doesn’t rotate. This means that undercuts are not possible. Here is an illustration to clarify:

File Preparation Checklist
Units: inches
Layout board economically
Check Offset/Cutter Tolerance for nested parts
Within X and Y bounds for machine
Within Z bounds, usually 0”-6” cutter depending.
Join Vectors.
Check for duplicate lines.
Create Layers.
Assign Vectors to layers.
Export Vector file for vector or 2.5D cuts.
Export STL for 3D engraves.
Layer Naming Convention
- Cut_DepthOfCut_CenterofLine/InsideOfLine/OutsideOfLine_SpecifiedCutterDim
i.e Cut_750_CenterOfLine_250_EndMill (125 = ⅛”, 250 = ¼”, 500 = ½”, 750 = ¾”, 1000 = 1”)
- Drill_DepthOfDrill_SpecifiedCutterDim
- Engrave_DepthOfEngrave_DegreeOfVBIT
- Pocket_DepthOfPocket_SpecifiedCutterDim
Machine Preparation Checklist
Warm up spindle for 6-9 minutes with [C][5]routine (preferred) or 1⁄2 RPM if you do not have spindle speed control. Confirm operation of spindle fan.
Check bit, collet and collet nut for wear and debris. Collets are good for 400-500 hours MAXIMUM of use if they are kept clean and no “event” occurs such as a broken bit inside the collet or a plunge that bottoms out on the collet.
Check rack/pinion/motor/shaft relationship by rapidly pushing and pulling the carriages near each motor. X1, X2, Y and Z. Adjust motor mount and/or tighten set screws. A slight clicking sound should be heard, but no movement (over a few thousandths) should be present. Adjust if needed.
Move the machine around the table in both jog and move speeds, or make a short warm up routine.
Home the tool [C][3] routine using the prox switches.
Zero your bit [C][2] (or other custom zero routine) to material surface or spoilboard.
Verify that your bit has been zeroed properly by using a MZ,0 command over the surface you have zeroed the bit to. Repeat zeroing if not correct.
Perform a visual inspection of the machine, wiring, dust collection hoses and table surface. Verify proper operation of vacuum pump and dust collector (if present)
Guides & Documents
Weekly Checklist
Clean rack and pinions for X,Y and Z (2nd Z if present) with small brush and re-grease. Add a BB size blob of light grease every 6” and run the tool to its extents in all axes about 10 times. Wipe off any excess grease and recheck X & Y with push/pull test.
Clean the Utilitrack (C channel rails on sides of PRS Z extrusion) with a solvent/lube like WD-40 and Scotchbrite pad. In high dust environments plastic rail wipers may have to be removed for proper cleaning of buildup. Wipe with light grease or machine oil.
Scrub all hardened V rails with Scotchbrite pad saturated with WD-40. Wipe with clean rag. Remove dust covers and check V rollers for buildup and clean with small brass brush if needed.
Add light machine oil to felt oilers inside of the 8 wheel covers and z-axis sweeps.
Check rack/pinion/motor/shaft relationship by rapid push-pull. X1, X2, Y and Z. Adjust motor mount or tighten set screws.
Notes
- Swapped out control board twice on 48x48.
- Regrounded 48x48, feels like it has stuxnet. Random crashing/plunging…
- Redid Vac table on 48x48, ended up just switching to plastic pneumatic nailer to hold material to MDF spoilboard. Expensive, but worth it!
- 2016, UArts ID Shop 48x48 Machine was scrapped as it would not stop crashing.
- 2016, Workshop School needed dust collection, I made an adaptor to standard ducting from original dust plate on 96x48.